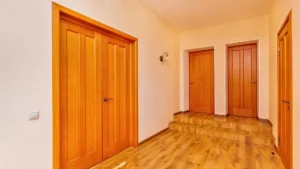
Decorative veneers are slender pieces of wood that make regular furniture look like amazing art pieces. These very thin sheets, usually from 0.6mm to 3mm in thickness, give the appearance of beautiful unusual woods without costing too much money. Whether you use common woods such as oak or walnut, or even rare kinds like zebra wood, these veneers open up limitless design opportunities for personalized furniture works.
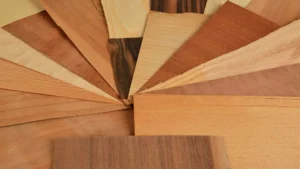
Veneers are made by cutting logs in various methods, which gives different grain patterns. The plain slicing method makes grains that are straight! Rotary cuttings create wide and sweeping grains. If you do quarter slicing, it results in tight and straight lines – ideal for formal furniture pieces. Knowing these cuts allows you to choose the appropriate veneer for your particular design idea.
Choosing the Right Veneer Type
Veneers with paper backing are more suitable for starters because they are flexible and easy to handle. Wood veneers in their raw form deliver better quality but demand higher skills for a smooth application. Pay close attention to the grain pattern – book-matched veneers give you mirror-like images, whereas slip-matched ones offer an uninterrupted flow of grains. Your selection is based on the desired look and intricacy of your project.
Veneers with phenolic backing give more stability for uses under high stress such as cabinet doors. Options with fleece backing provide great adaptability around curves and uneven surfaces. For projects outside, think about using pre-finished veneers that withstand moisture and UV harm better than the usual raw types.
Essential Tools and Materials
For applying veneer successfully, certain tools are necessary: a saw for cutting the veneer neatly, a roller to ensure it sticks well and either contact cement or wood glue for bonding. Additional items like an iron for smoothing out surfaces, a sharp utility knife and sandpaper are required to give final touches. A good adhesive is very important – select one that suits your project needs as well as your preferred working time.
Often, expert woodworkers utilize vacuum presses for big panels to make sure the pressure is spread evenly. Glues that activate with heat function nicely with home irons and this allows adjusting position prior to ultimate bonding. Tools like edge banding trimmers are used for making perfect flush edges and veneer punches fix small faults without a trace.
Preparation and Application Process
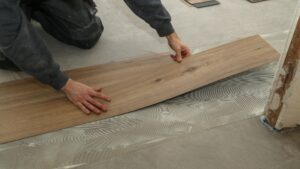
First, make sure your surface is smooth and free of dust. Then measure and cut the veneer pieces a bit bigger for later trimming. Spread glue evenly on both surfaces as per manufacturer’s guide about how long to leave it open. Place the veneer with care – usually, you have just one opportunity to position it correctly when using contact cement.
Temperature and moisture greatly influence the behavior of veneers. Before using, keep veneers flat in balanced conditions. If brittle veneers are slightly moistened, they become more flexible while those sheets that are too pliable might require some time to dry. You should mark the direction of grain regularly to keep pattern flow in order across many pieces.
Common Mistakes to Avoid
If you hurry the glue drying process, it can result in weak sticking and future breakdowns. Stay away from using veneer sheets that are broken or bent because defects will become lasting. Edge preparation is something not to forget – edges which are not sealed let water enter and lift them up. In the end, keep steady pressure when applying to avoid problems with peeling that can affect how long your completed work lasts and looks good.